Ducks ALIVE in 2025!

ducks4you

Garden Master
Joined
Sep 4, 2009
Messages
12,539
Reaction score
17,840
Points
437
Location
East Central IL, Was Zone 6, Now...maybe Zone 5
Got my 2nd fenceline planted, this time with sugar snap peas. The seeds are 3yo, so I planted them thickly. They are just about 2 to 2 1/2 inches apart. I am sure to have some sprout. I can come back later and reseed.
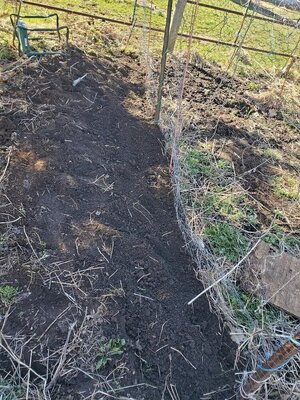
I dug with my spade about 5-6 inches deep right next to the chicken wire fencing and about 8-10 inches south and deposited that soil south of the planting bed. I have been growing here for several years now and the soil was very easy to handle, even though it had some natural compacting.
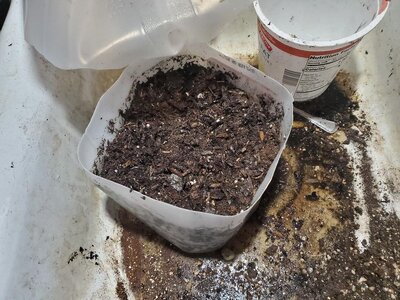
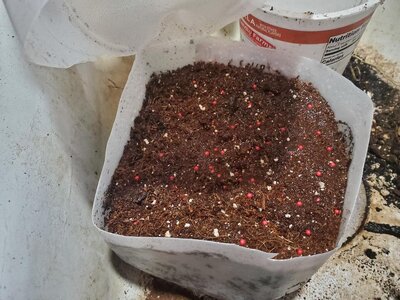
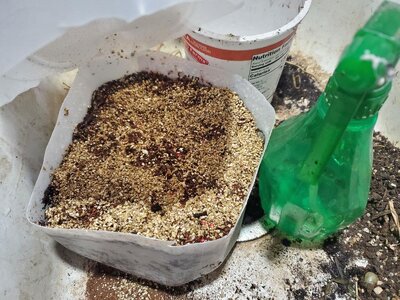
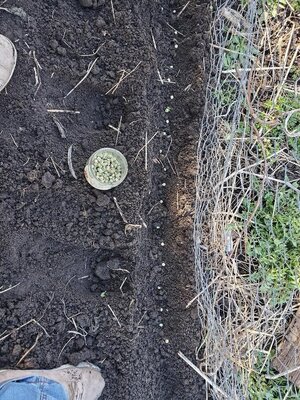
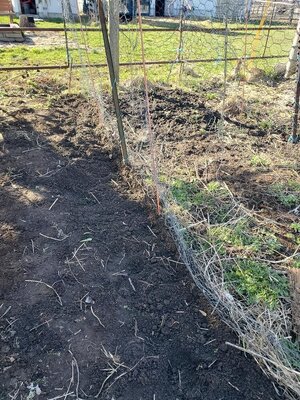
Here is the planting row before planting, a shot of the peas--I planted 90 sugar snap pea seeds in this 12 ft row--and a shot after planting, which looks identical to the first shot. I also sowed scallions and mescalun lettuce seeds, just to see if they will fill in. I really didn't cover Those seeds. We are expecting heavy rain Wednesday afternoon and the scallion seeds match the color of the soil, and I am not going to worry about any birds eating them, since they are eating Something? in my north pasture right now.
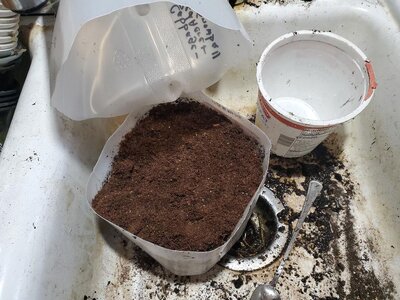
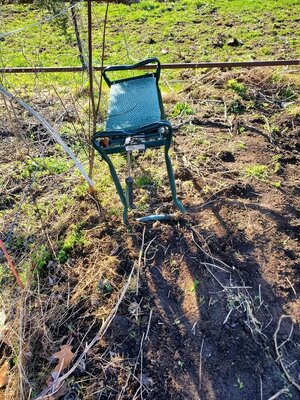
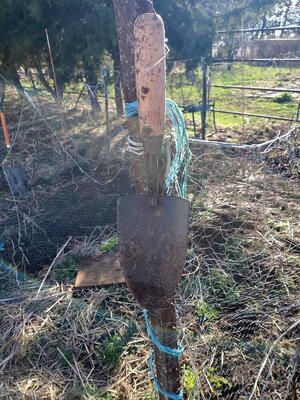
When I used my hand rake to push back the soil I had dug out, I discovered that the soil in between this fenceline and the fenceline to the south is Really rich. I have been dumping there from soiled horse bedding for years now and it's been breaking down into nice compost. You can see a mound in between each of the fencelines and I am thinking I should move this to use somewhere else, especially since I am not growing anything there--too much foot traffic, that is, My foot traffic. I took a shot of my garden seat--you can See how the soil in between is mounded--which is waiting for tomorrow's planting, and where I deposited my new trowel hanging from a metal fencepost. I couldn't find my other 2 trowels, and this one that I just bought at Dollar General is actually pretty sturdy. OH, and more German red garlic is up!
 

Attachments

  • Peas on 2nd fenceline, 03-17-25, #1.jpg
    Peas on 2nd fenceline, 03-17-25, #1.jpg
    358.3 KB · Views: 15
  • Peas on 2nd fenceline, 03-17-25, #2.jpg
    Peas on 2nd fenceline, 03-17-25, #2.jpg
    367.4 KB · Views: 14
  • Peas on 2nd fenceline, 03-17-25, #3.jpg
    Peas on 2nd fenceline, 03-17-25, #3.jpg
    368.8 KB · Views: 16
  • Garden seat waiting for tomorrow, 03-17-25.jpg
    Garden seat waiting for tomorrow, 03-17-25.jpg
    395.9 KB · Views: 21
  • Hand trowel hanging, 033-17-25.jpg
    Hand trowel hanging, 033-17-25.jpg
    265.4 KB · Views: 17
Last edited:

flowerbug

Garden Master
Joined
Oct 15, 2017
Messages
17,565
Reaction score
28,413
Points
427
Location
mid-Michigan, USoA
Sapphire Beauty Dutch Iris blooming. Forgot I planted this. Dandelions aren't even up yet.View attachment 73265

yes, those are similar to the ones that normally come out really early here too. bulb irises. i have several kinds. always great to see even if they may get buried in snow or frost damaged. some years i've even had them out in warm enough weather that they've gotten pollinated from the bees.
 

ducks4you

Garden Master
Joined
Sep 4, 2009
Messages
12,539
Reaction score
17,840
Points
437
Location
East Central IL, Was Zone 6, Now...maybe Zone 5
I finally planted 2 take home containers with Microgreens. It is on top of the fridge. Eldest DD (Chef) says she wants the harvests. I was surprised at the amount of seeds in this one packet.
Last Fall I bought six packages on clearance, 12 cents each. I dead reckon that every package can grow about 3 small containers, and I have read to use a lot of seeds. I will check on these in a few days, keep them well watered on top of a heat mat on top of the fridge. I put holes in the bottoms and the lids. I held a knife to a candle flame to heat it up and make it easier to make the holes. Each has a plastic (lid) tray that I can keep full of water to help.
 

Attachments

  • Microgreens 2024 started to of fridge, 03-18-25.jpg
    Microgreens 2024 started to of fridge, 03-18-25.jpg
    158.4 KB · Views: 7
  • Microgreens 2024, front of pkg.jpg
    Microgreens 2024, front of pkg.jpg
    134.9 KB · Views: 8
  • Microgreens 2024, back of pkg.jpg
    Microgreens 2024, back of pkg.jpg
    110.5 KB · Views: 8
Last edited:

flowerbug

Garden Master
Joined
Oct 15, 2017
Messages
17,565
Reaction score
28,413
Points
427
Location
mid-Michigan, USoA


shows two of them that i have (the blue and dark purple reddish). i used to have a yellow one but i'm not sure i do any longer, plus i don't know if i have any pics of those (i should have, but perhaps i never did because those wispy ones don't stick around for long and cold weather does them in even faster).

...lemme go look at my picture collection and see if i do have any of them...

ok, i do have pictures of some of the yellow and perhaps another purple/blue type but those were pictures taken the first few years after they were planted (2011-2013ish). they don't seem to have persisted or i've never been out there to get pictures of them in recent years. i didn't post any of those to my website (probably because i'd not gotten any more recent pics - i no longer remember why - yes i do admit it that my memory isn't perfect like the rest of me... :) ).
 

ducks4you

Garden Master
Joined
Sep 4, 2009
Messages
12,539
Reaction score
17,840
Points
437
Location
East Central IL, Was Zone 6, Now...maybe Zone 5
I had the first eye exam yesterday since...decades ago?!? I was dilated and couldn't really take advantage of the 4 hours of dry weather when I got home.
I wish I had gotten more seeds in the ground, BUT, all of the peas, etc. that I planted were well watered by the heavy rains, so I'll take THAT as a win.
**I would like to emphasize to anyone here who gets discouraged, TAKE THE SMALL WINS and celebrate!!
:weee:weee
:weee

I noticed on Tuesday that some of the winter sowing jugs were a little bit dry. I plan to check them today and liberally water them all, since they all have drainage holes on the bottoms of the jugs.
Still learning, BUT, I have a routine:
1) Label on the existing label with a black sharpie, what the seeds are
2) Label same higher up around the handle
3) Cover first label with packaging tape
4) Cut holes on the bottom of the jug
5) Slice all of the way around leaving about 2-3 inches around the handle for planting, sealing, and leaving the handle to transport
6) Fill with potting soil up to about one inch below the slice
7) Thoroughly soak the potting soil and drain
8) Put in a handful of seed starting soil
9) Plant seeds
10)Use a spray bottle and thoroughly soak the seeds and starter soil
11)Tape shut with duck tape
12)Remove the lid (I haven't yet decided if I will need to leave the lid on for future plantings when the weather is warmer)
I took some pictures to help describe this.
BTW, I have seeds up in one of the lettuce jugs and in another jug. It's been about one week.
 

Attachments

  • Winter jug sowing procedure, 03-13-25, #1.jpg
    Winter jug sowing procedure, 03-13-25, #1.jpg
    92.1 KB · Views: 4
  • Winter jug sowing procedure, 03-13-25, #2.jpg
    Winter jug sowing procedure, 03-13-25, #2.jpg
    217 KB · Views: 3
  • Winter jug sowing procedure, 03-13-25, #3.jpg
    Winter jug sowing procedure, 03-13-25, #3.jpg
    187.4 KB · Views: 4
  • Winter jug sowing procedure, 03-13-25, #4.jpg
    Winter jug sowing procedure, 03-13-25, #4.jpg
    221 KB · Views: 3
  • Winter jug sowing procedure, 03-13-25, #5.jpg
    Winter jug sowing procedure, 03-13-25, #5.jpg
    205.9 KB · Views: 2
  • March 13, 2025, winter sowing.jpg
    March 13, 2025, winter sowing.jpg
    110.5 KB · Views: 4

ducks4you

Garden Master
Joined
Sep 4, 2009
Messages
12,539
Reaction score
17,840
Points
437
Location
East Central IL, Was Zone 6, Now...maybe Zone 5
Indoor gardening today. VERY WET outside, also very windy. I redid the soil for the sickly spider plant. It was in the wrong soil and had very wet feet. It had a long root, I mixed less than the best soil with straight sand, put it in a terra cotta pot with a drainage hole and it is sitting in another (blue) terra cotta pot without drainage, but it sits up a few inches so good air flow.
I found a container with old parsley seeds, so I started them. The container was plastic with a hinged lid and inside was an aluminum tray. It had housed cinnamon rolls. I melted small holes in the bottom plastic, I sliced holes in the bottom of the aluminum tray, and I melted holes in the top. The tray sits on top of about 8 pebbles to keep it a little bit higher. I probably should give it a tray so that I can water from below. Parsley takes
FOREVER to sprout so that's a tomorrow job! They are now on top of the fridge with the microgreens.
I started basil seeds in terra cotta pot that doesn't drain, labeled it, and it is now by the south facing kitchen windows with a ziploc bag hat of sorts. We will see what comes of it, but it won't dry out there.
Middle DD (Gardener) bought me a new tabletop gro light that has a timer on it, 8 hrs, 12 hrs, or 16 hrs. I finally cleaned the top of the black fridge and set the new gro light unit up there. I also cleaned up the heat mat.
Fridge top, 03-20-25.jpg
 

Attachments

  • Sick spider plant, 03-20-25.jpg
    Sick spider plant, 03-20-25.jpg
    112.1 KB · Views: 0
  • Pretty blue pot, 03-20-25.jpg
    Pretty blue pot, 03-20-25.jpg
    80.7 KB · Views: 0
  • Basil, 03-20-25.jpg
    Basil, 03-20-25.jpg
    133.2 KB · Views: 0
  • Parsley (old) seeds, 03-20-25.jpg
    Parsley (old) seeds, 03-20-25.jpg
    168.2 KB · Views: 0

Latest posts

Top